http://www.doughmesstic.net/2010/03/05/its-good-to-have-friendsSo there is this AWESOME giveaway on her website. Go check out the details, but make sure that when you do, you say that you saw this on Niki Theo's blog!
You can win a KitchenAid mixer for yourself and one for me!!! I think this is a win-win situation, don't you?
Check it out here:
http://www.doughmesstic.net/2010/03/05/its-good-to-have-friends
Tuesday, March 9, 2010


Monday, March 8, 2010
Galopita, one of my favorite Greek desserts (or breakfast!)
One of the desserts I love a lot of Galopita, or another version called Galaktobouriko that use fillo dough (which I will cover as well).
This dessert is made every Christmas and every Easter, no matter what. It's a standard that I plan on keeping when I'm in charge of both holidays.
Basically, galopita is a baked custard of sorts. Not like creme brulee or creme caramel, but baked and delicious. From what I have learned, the way my mother was taught and the way I was taught is not a standard recipe. Probably b/c of the Farina used. Not too many people have heard of Farina, but it is sold right next to the Cream of Wheat in the cereal section. We love Farina in our house. On cold winter Saturdays, we'll make a little pot full of the stuff, plain. Mom puts black raspberry jelly in hers. I usually pour honey in mine. Dad can take it any way he wants, but usually honey and raisins.
 Apparently, they carry is in a brown rice version, but I haven't tried it. I prefer the old time stuff. Plus, this version is expensive as hell!!!
Anyways, let's get back on track here. This recipe can seem complicated, which was why I never learned it before this past Christmas. But I sucked it up and helped my mom make it. I'm glad I did b/c it's not as scary as it seemed...
This recipe makes 2- 9x13 pans of the stuff. Typically, my mom will make one galopita and one galaktobouriko, but the pictures below will only show the galopita. I will tell you how to convert it to galaktobouriko; don't worry, it's easy!!!
Ingredients:
-1 gallon of milk. (you can use any milk, but if you use whole milk, cut the Farina by 1/4 cup. we use skim milk)
-1 stick of butter (we use salted, but it doesn't matter which you use)
-2 cups of sugar
-2 1/2 cups of Farina (or 2 1/4 cups for whole milk)
-2 tsp real vanilla extract
-4 large eggs
-1/2 cup of honey
-2 Tbsp of water
Directions:
Preheat oven to 350 degrees. Grease 2- 9x13 pans. If you are using glass pans, preheat the oven to 325 degrees only.
We suggest microwaving (I know, it's so bad!) the milk for about 10-15 minutes first to get it warmed up. Since there is a tons of milk being warmed, it'll take forever on the stove top from being cold and you will have a greater chance scalding the milk if it's not warmed through first.
After you warm it in the mircowave, put it on a medium setting on the stove top. Put the stick of butter (cold, whole, cut up, however you want, just not melted) into the milk while it's heating up. Also pour in the sugar. Let the milk heat up until it is slightly bubbling, but not boiling. Make sure you are stirring frequently w/ a wooden spoon to keep the bottom of the pan from burning the milk. You can taste the milk to make sure it is sweet enough at this point. If not, add a bit more sugar, 2 Tbsp as a time.
While the milk is heating up, beat the eggs w/ an electric mixer, using the whisk attachment. Beat until they are extremely fluffy and bubbly.
Once the milk is thoroughly heated and slightly bubbly, turn off the heat and pour in the Farina, slowly and constantly stirring. You do not want to stop stirring b/c you do not want it to clump up or burn on the bottom! Add the vanilla. Keep stirring.
Once it is COMPLETELY mixed and smooth, add a little bit of the Farina mixture to the eggs while they are still beating, to temper them. Just add a little bit, slowly. You want to heat the eggs up enough to temper them so that they don't cook when you add them to the Farina b/c then you've just wasted a whole gallon of milk.
When the eggs are tempered, add the egg mix to the Farina and stir hard and fast, you can use the wooden spoon still, or do as I did and grab a whisk. It makes it easier.
Once it is completely mixed together, pour the Farina evenly into each greased pan**
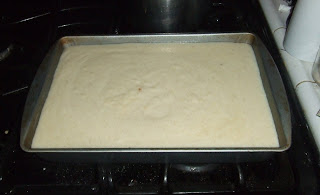
Bake for about 1 hour, until the top is nice and golden brown.


 You have to poke holes to get the honey to sink into the galopita. This is good served warm or cold.

This dessert is made every Christmas and every Easter, no matter what. It's a standard that I plan on keeping when I'm in charge of both holidays.
Basically, galopita is a baked custard of sorts. Not like creme brulee or creme caramel, but baked and delicious. From what I have learned, the way my mother was taught and the way I was taught is not a standard recipe. Probably b/c of the Farina used. Not too many people have heard of Farina, but it is sold right next to the Cream of Wheat in the cereal section. We love Farina in our house. On cold winter Saturdays, we'll make a little pot full of the stuff, plain. Mom puts black raspberry jelly in hers. I usually pour honey in mine. Dad can take it any way he wants, but usually honey and raisins.
Apparently, they carry is in a brown rice version, but I haven't tried it. I prefer the old time stuff. Plus, this version is expensive as hell!!!Anyways, let's get back on track here. This recipe can seem complicated, which was why I never learned it before this past Christmas. But I sucked it up and helped my mom make it. I'm glad I did b/c it's not as scary as it seemed...
This recipe makes 2- 9x13 pans of the stuff. Typically, my mom will make one galopita and one galaktobouriko, but the pictures below will only show the galopita. I will tell you how to convert it to galaktobouriko; don't worry, it's easy!!!
Ingredients:
-1 gallon of milk. (you can use any milk, but if you use whole milk, cut the Farina by 1/4 cup. we use skim milk)
-1 stick of butter (we use salted, but it doesn't matter which you use)
-2 cups of sugar
-2 1/2 cups of Farina (or 2 1/4 cups for whole milk)
-2 tsp real vanilla extract
-4 large eggs
-1/2 cup of honey
-2 Tbsp of water
Directions:
Preheat oven to 350 degrees. Grease 2- 9x13 pans. If you are using glass pans, preheat the oven to 325 degrees only.
We suggest microwaving (I know, it's so bad!) the milk for about 10-15 minutes first to get it warmed up. Since there is a tons of milk being warmed, it'll take forever on the stove top from being cold and you will have a greater chance scalding the milk if it's not warmed through first.
After you warm it in the mircowave, put it on a medium setting on the stove top. Put the stick of butter (cold, whole, cut up, however you want, just not melted) into the milk while it's heating up. Also pour in the sugar. Let the milk heat up until it is slightly bubbling, but not boiling. Make sure you are stirring frequently w/ a wooden spoon to keep the bottom of the pan from burning the milk. You can taste the milk to make sure it is sweet enough at this point. If not, add a bit more sugar, 2 Tbsp as a time.
While the milk is heating up, beat the eggs w/ an electric mixer, using the whisk attachment. Beat until they are extremely fluffy and bubbly.
Once the milk is thoroughly heated and slightly bubbly, turn off the heat and pour in the Farina, slowly and constantly stirring. You do not want to stop stirring b/c you do not want it to clump up or burn on the bottom! Add the vanilla. Keep stirring.
Once it is COMPLETELY mixed and smooth, add a little bit of the Farina mixture to the eggs while they are still beating, to temper them. Just add a little bit, slowly. You want to heat the eggs up enough to temper them so that they don't cook when you add them to the Farina b/c then you've just wasted a whole gallon of milk.
When the eggs are tempered, add the egg mix to the Farina and stir hard and fast, you can use the wooden spoon still, or do as I did and grab a whisk. It makes it easier.
Once it is completely mixed together, pour the Farina evenly into each greased pan**

Bake for about 1 hour, until the top is nice and golden brown.

Depending on your oven, I would check it after 45 minutes, just to be safe. If it isn't ready, this would be the perfect time to take the honey and heat it on the stove top. Add 2 Tbsp of water to thin the honey out, but you do not want watery honey! You just want it a bit thinner than normal syrupy honey is.

Once you pull the galopita out of the oven, poke a fork throughout the top of the dessert. Take the warmed thinned honey mixture and spoon over the top.


As you can see, it's not drenched in honey. Add as much as you like, but once it all settles, it won't be drenched and soggy. It'll be delicious :)
**Okay, for galaktobouriko. The only difference as I said before was the addition of fillo dough. When making galaktobouriko, instead of pouring the Farina mix directly into the greased pan, first you are going to layer fillo dough onto the greased pan. Lay one layer down, letting the edges hang over the sides and ends, lightly brush on melted butter, add another layer, more melted butter, etc. You are going to want 7 layers, but the key is to make sure you brush a light layer of melted butter on top of each layer before adding the next one. Pour the Farina mix on top and then add more fillo layers, one at a time w/ melted butter on top of each layer. Once it is covered, trim the excess fillo dough. You can then press or tuck the edges in together like you would a double crusted pie. I admit that I do prefer galaktobouriko over galopita, but I will eat both any day that it's offered to me!
Btw, some people use citrus extracts or liquor in their versions of these desserts. I'm not saying they are wrong and I'm not saying I'm right, but I am just saying that I prefer the simply taste of the vanilla and honey. I'm not into adding citrus, but it is completely my tastes! If you want to add a bit of citrus extract or liquor, do it where I added the vanilla.
Thursday, February 4, 2010
Paula Deen's Chocolate Cream Cheese Pound Cake
So I thought I lost this recipe!!! But nope, I found it again! I don't remember the original site I found it on, mostly b/c I made this forever and a day ago, but I do remember everything about it and of course, I still have the recipe handwritten down, so I get to post it for you all!

My blogger is acting funny right now, so this post is gonna be all over the place! I just know it! Sorry...
Ingredients:
1 cup butter, softened
8 ounces cream cheese, softened
3 cups sugar
6 eggs
1 teaspoon pure vanilla extract
2 1/4 cups cake flour
1 teaspoon baking powder
3/4 cup cocoa
Directions:
Preheat oven to 325 degrees. Grease/spray a 10-inch Bundt pan.
Cream butter, cream cheese, and sugar. Add eggs one at a time, beating well after each. Add vanilla.
In a separate bowl, combine flour, baking powder, and cocoa. Add about half of the flour mixture to the butter mixture and beat well. Add remaining flour mixture and beat well for about 2 minutes.
Pour batter into Bundt pan. Bake for 1 hour and 15 minutes or until done.
Let cool, remove from the pan onto your serving dish.
(read below the pictures, there's more!)


Okay, so I told you blogger is messing with me. Silly pictures won't move out of my way!!!
Anyways, I have a couple of things about this cake. One, it is HARDCORE dense. It isn't fudgy chocolatey. It's just chocolatey. You can definitely "taste" the cream cheese and in all honesty, I wasn't all that keen on that part of it, but it wasn't bad. I write "taste" b/c it wasn't so much that it tasted like cream cheese, it was more so that I can taste the texture of cream cheese mixed in with the cake. If that makes any sense at all.
If you're looking for a really chocolatey cake, this def isn't it. If you're looking for a hint of chocolate, this is def it.
The night I made it both my mother and I had a piece. The bottom of the cake, which is actually the top while it's baking was really crusty. My mom loved that; I hated it. I would recommend if you don't like crusty bottoms/tops, cover the top with foil while it bakes. Then it won't get hard and crusty.
Also, the cake was lighter the first night while it was still warm. But it was still thick. No solid dense like the next day, but thick. You could def tell this was a pound cake, not a devil's food cake.
Overall, I liked the cake, but it's not going to be one I ever make again. I will, however, be putting foil over bundt pans anytime I make a pound cake in one again. Just in case. I'd rather have a guaranteed soft cake than a possibly crusty one.
Sunday, January 31, 2010
Balsamic Roasted Brussels Sprouts
So this is a really easy side dish to put together when you need to focus on everything else. But it is soooooo good. OMG, it is good. Delicious. Wonderful. Awesomely amazing. And this coming from someone who HATED Brussels Sprouts up until I went to Culinary School. I hated bacon too. What was wrong with me?
Anyways, all you need to make this dish is:
As many Brussels Sprouts as you'd like or need.
Olive Oil
Balsamic Vinegar
Fresh Garlic
Fresh Cracked Pepper
Sea Salt
Preheat your oven to 350 degrees F.
You can use a baking dish or take a cookie sheet and line it w/ heavy duty foil.
Cut the bottoms off the Brussels Sprout, leaving enough to keep the leaves together. From the top of the head to the bottom, cut the Brussels Sprouts in half. Toss them in a bowl. Coat w/ as much or as little olive oil as you'd like. Chop or mince the garlic, however you'd prefer and toss them w/ the sprouts and oil. Put the coated sprouts and garlic in the baking dish or on the lined cookie sheet (you can also do the coating of the oil directly in/on the dish/sheet).
Sprinkle seal salt to your liking. Crack fresh black pepper over the top. Drizzle some of the balsamic vinegar on top.
Bake for 45 mins, or longer depending on how much you want the sprouts to crisp up. I let mine go for just a few minutes longer.

 Look how delicious they are! The garlic got nice and caramelized and inside halves and leaves of the sprouts have a little crisp to them but the inside is tender and tastes delicious. The olive oil helps give them a nice caramelized flavor to the outside and the balsamic gives them a nice tang to finish them off.
These go phenomenally w/ a nice steak or roast with some baked or roasted potatoes. Or if you're like me, you just make a meal out of them alone and toss them in bowl and chow down :)
Anyways, all you need to make this dish is:
As many Brussels Sprouts as you'd like or need.
Olive Oil
Balsamic Vinegar
Fresh Garlic
Fresh Cracked Pepper
Sea Salt
Preheat your oven to 350 degrees F.
You can use a baking dish or take a cookie sheet and line it w/ heavy duty foil.
Cut the bottoms off the Brussels Sprout, leaving enough to keep the leaves together. From the top of the head to the bottom, cut the Brussels Sprouts in half. Toss them in a bowl. Coat w/ as much or as little olive oil as you'd like. Chop or mince the garlic, however you'd prefer and toss them w/ the sprouts and oil. Put the coated sprouts and garlic in the baking dish or on the lined cookie sheet (you can also do the coating of the oil directly in/on the dish/sheet).
Sprinkle seal salt to your liking. Crack fresh black pepper over the top. Drizzle some of the balsamic vinegar on top.
Bake for 45 mins, or longer depending on how much you want the sprouts to crisp up. I let mine go for just a few minutes longer.


These go phenomenally w/ a nice steak or roast with some baked or roasted potatoes. Or if you're like me, you just make a meal out of them alone and toss them in bowl and chow down :)
Red Velvet Cheesecake
Okay, okay, I know this post is super late! But I can explain. I tried to get the three cookies recipes and the pasticio recipe up as quickly as possible after Christmas, and then I got busy! It's been a busy month! But now that it has calmed down, I need to get this post up before it's Christmas cheesecake in July! :)
This is my go to cheesecake recipe. I've been using this one for a LONG TIME now and I love it. I've made lots of variations of it, like the Oreo Cheesecake (slightly changed) I made a while back, the Pumpkin cheesecake I made for Thanksgiving, and just plain over and over again.
This time, to keep up w/ my newly developed tradition of making not so common festive treats, I wanted to make a red velvet cheesecake. I played around with a couple of ideas before finally creating this one. The cheesecake batter is plain vanilla cheesecake. But what I did here was a make a red velvet crust and divided the batter into two parts and used green food coloring to make a green and white swirl. So the overall cheesecake had all the traditional Christmas colors: Red, Green and White.
It was so gorgeous cheesecake and it was delcious. The crust was my personal favorite new crust. I don't know where I came up with this idea, but it had a little to do with the Red Velvet Cheesecake bars I made for my friend Becky's wedding reception in June, but it was definitely not the same.
Red Velvet Cheesecake
Crust:
1 box of red velvet cake mix
1/2-3/4 stick of butter, melted
Filling:
4 (8 oz) pkgs of cream cheese, softened to room temp
1 1/3 cups light brown sugar
2 tsp vanilla extract
4 large eggs, at room temp
1 1/3 cups sour cream or heavy cream, or a combo of the two
Green Food coloring
Directions:
Spray a 9 inch spring form pan w/ non-stick cooking spray. Wrap the bottom of the pan w/ three layers of heavy duty aluminum foil. Set aside.
Mix 1/2 stick of melted butter with the cake mix. Do not use anything other than the powdery cake mix and the melted butter. Mix together until the batter becomes a thick, not crumbly "dough". If it is too dry w/ only the 1/2 stick melted butter, add in another 1/4 stick of melted butter. Try not to use too much more than this, or else it will be too greasy.
Press the "dough" into the greased pan. Press it into an even layer on the bottom circle, but also press some up the sides, at least and inch up. Try to make the corners as even as possible (I didn't do a great job of that as you'll see in other pictures, but it was still good).

Put a small saucepan of water on the stove top and bring to a boil. While the water is boiling, make the batter.
Beat the cream cheese at medium speed until it is soft, about 4 mins. W/ the mixer running, add the sugar and continue to beat about another 4 mins, until the cream cheese is light. Beat in the vanilla. Add the eggs one by one, beating a full minute after each addition. Reduce the speed to low and add the sour cream/heavy cream (I usually only use sour cream).
Take out half of the mixture and place in a large bowl. That is going to be the plain white part of the cheesecake.
Leaving the other half in the mixer, add a couple of drops of green food coloring. Blend. If you need more, feel free to add as much as you want, but remember, you don't want to over beat the batter, so try to stick to only one more addition after adding the first few drops, just in case.
Using equal sized measuring cups (I used half cups), sprayed w/ cooking spray for both batters, pour in a scoop of the white batter right in the middle of the prepared pan. Then pour a scoop of green batter right on top of the white batter. The white batter will spread out underneath the green. Then repeat w/ the white batter right on top of the green batter, and keep going until you're completely out of batter.
It'll look somewhat like this:
 I have to scrape the last bit of the white out of the bowl, so it wasn't as pretty and circular. But that's ok, I go for edible not just visual perfection :)
Once you've filled the pan w/ all of the batter, place a large roasting pan on the oven rack. Place the cheesecake pan in the middle and then slowly and carefully pour the boiling hot water into the roasting pan. Slowly and carefully push the rack into the oven and bake the cheesecake for 1 1/2 hours.
After the cheesecake has finished backing, turn off the oven and prop open the oven, just enough to let the air escape. You can see a picture of this in my Pumpkin cheesecake post.
Take the cheesecake out of the roasting pan and allow it to cool to room temp on the counter. Once it has reached room temp, place the cheesecake in the refrigerator for at least 4 hours, but overnight is preferred. And in all honesty, this isn't a cheesecake you want to make the day of. Making the batter and baking it and cooling it enough to refrigerate it... It's a lengthy process.


I managed to do a good job getting the dough up the sides as much as possible. For some reason I can never do this w/ crumb crusts and I really wanted people to be able to see the red crust, so I was really happy this worked. Much better than coloring melted butter red and mixing that w/ Nilla Wafers or shortbread cookies!! :)

The crust was awesome. You can do this with any crust you want. I think it would be great to use a spice cake mix w/ a pumpkin cheesecake, or a strawberry crust w/ a vanilla cheesecake and top it w/ more strawberries. Or a lemon crust w/ a lemon cheesecake... Endless possibilities. And my fav new way to make crust. The red velvet was a bit of a pain b/c as you can see above, it sticks to the knife (even if you wipe it!) so it doesn't make for pretty slicing.
 As I said before, you really want to get the corners of the dough as even w/ the rest of the crust as possible. This helps it bake more evenly. The crust is nice and crisp, but not super crisp like a crumb crust can be. Think homemade crackers. They are crisp, but not like saltines-crisp. So b/c the corners were so much thicker, the top of the crust in the corners wasn't as baked, which is why it stuck to the knife as much. It was definitely not raw... It just wasn't perfectly set.
But all in all, this cheesecake was awesome It tasted delicious, as usual. I really don't think you can mess this base recipe up at all. Even if you don't use a water bath, it'll probably still work well. You just might have a crack in top. But actually, I strongly recommend using a water bath. It helps the cheesecake bake evenly, which makes the WHOLE cheesecake smooth and creamy, as opposed to the outside edges hard and the middle smooth and creamy.
So that's not the last Christmas dessert we made, but since it was the most Christmas themed, I knew I should post it before everything else!!!
Enjoy!
Btw, I just bought this cheesecake pan (after Christmas, haven't used it yet) I am way excited to use it asap, b/c then maybe I won't have to use three layers of heavy duty foil to keep water form the water bath leaking in!!!
This is my go to cheesecake recipe. I've been using this one for a LONG TIME now and I love it. I've made lots of variations of it, like the Oreo Cheesecake (slightly changed) I made a while back, the Pumpkin cheesecake I made for Thanksgiving, and just plain over and over again.
This time, to keep up w/ my newly developed tradition of making not so common festive treats, I wanted to make a red velvet cheesecake. I played around with a couple of ideas before finally creating this one. The cheesecake batter is plain vanilla cheesecake. But what I did here was a make a red velvet crust and divided the batter into two parts and used green food coloring to make a green and white swirl. So the overall cheesecake had all the traditional Christmas colors: Red, Green and White.
It was so gorgeous cheesecake and it was delcious. The crust was my personal favorite new crust. I don't know where I came up with this idea, but it had a little to do with the Red Velvet Cheesecake bars I made for my friend Becky's wedding reception in June, but it was definitely not the same.
Red Velvet Cheesecake
Crust:
1 box of red velvet cake mix
1/2-3/4 stick of butter, melted
Filling:
4 (8 oz) pkgs of cream cheese, softened to room temp
1 1/3 cups light brown sugar
2 tsp vanilla extract
4 large eggs, at room temp
1 1/3 cups sour cream or heavy cream, or a combo of the two
Green Food coloring
Directions:
Spray a 9 inch spring form pan w/ non-stick cooking spray. Wrap the bottom of the pan w/ three layers of heavy duty aluminum foil. Set aside.
Mix 1/2 stick of melted butter with the cake mix. Do not use anything other than the powdery cake mix and the melted butter. Mix together until the batter becomes a thick, not crumbly "dough". If it is too dry w/ only the 1/2 stick melted butter, add in another 1/4 stick of melted butter. Try not to use too much more than this, or else it will be too greasy.
Press the "dough" into the greased pan. Press it into an even layer on the bottom circle, but also press some up the sides, at least and inch up. Try to make the corners as even as possible (I didn't do a great job of that as you'll see in other pictures, but it was still good).

Put a small saucepan of water on the stove top and bring to a boil. While the water is boiling, make the batter.
Beat the cream cheese at medium speed until it is soft, about 4 mins. W/ the mixer running, add the sugar and continue to beat about another 4 mins, until the cream cheese is light. Beat in the vanilla. Add the eggs one by one, beating a full minute after each addition. Reduce the speed to low and add the sour cream/heavy cream (I usually only use sour cream).
Take out half of the mixture and place in a large bowl. That is going to be the plain white part of the cheesecake.
Leaving the other half in the mixer, add a couple of drops of green food coloring. Blend. If you need more, feel free to add as much as you want, but remember, you don't want to over beat the batter, so try to stick to only one more addition after adding the first few drops, just in case.
Using equal sized measuring cups (I used half cups), sprayed w/ cooking spray for both batters, pour in a scoop of the white batter right in the middle of the prepared pan. Then pour a scoop of green batter right on top of the white batter. The white batter will spread out underneath the green. Then repeat w/ the white batter right on top of the green batter, and keep going until you're completely out of batter.
It'll look somewhat like this:

Once you've filled the pan w/ all of the batter, place a large roasting pan on the oven rack. Place the cheesecake pan in the middle and then slowly and carefully pour the boiling hot water into the roasting pan. Slowly and carefully push the rack into the oven and bake the cheesecake for 1 1/2 hours.
After the cheesecake has finished backing, turn off the oven and prop open the oven, just enough to let the air escape. You can see a picture of this in my Pumpkin cheesecake post.
Take the cheesecake out of the roasting pan and allow it to cool to room temp on the counter. Once it has reached room temp, place the cheesecake in the refrigerator for at least 4 hours, but overnight is preferred. And in all honesty, this isn't a cheesecake you want to make the day of. Making the batter and baking it and cooling it enough to refrigerate it... It's a lengthy process.

Unfortunately, I was making this on Christmas Eve and we were also making galopita (recipe coming soon) and pasticio so I couldn't let my cheesecake sit in the oven longer than 20 mins. We really had to get moving. So I took it out of the oven and put it on a cookie sheet on the table. I left the foil on b/c it is still baking a bit in the pan in the oven, so I was thinking I should keep it insulated w/ the foil to keep the heat in and slowly cool like it would in the oven. After a while, I took the foil off and let it sit in just the pan. I finally braved taking it out of the pan a little while later.

I managed to do a good job getting the dough up the sides as much as possible. For some reason I can never do this w/ crumb crusts and I really wanted people to be able to see the red crust, so I was really happy this worked. Much better than coloring melted butter red and mixing that w/ Nilla Wafers or shortbread cookies!! :)

The crust was awesome. You can do this with any crust you want. I think it would be great to use a spice cake mix w/ a pumpkin cheesecake, or a strawberry crust w/ a vanilla cheesecake and top it w/ more strawberries. Or a lemon crust w/ a lemon cheesecake... Endless possibilities. And my fav new way to make crust. The red velvet was a bit of a pain b/c as you can see above, it sticks to the knife (even if you wipe it!) so it doesn't make for pretty slicing.

But all in all, this cheesecake was awesome It tasted delicious, as usual. I really don't think you can mess this base recipe up at all. Even if you don't use a water bath, it'll probably still work well. You just might have a crack in top. But actually, I strongly recommend using a water bath. It helps the cheesecake bake evenly, which makes the WHOLE cheesecake smooth and creamy, as opposed to the outside edges hard and the middle smooth and creamy.
So that's not the last Christmas dessert we made, but since it was the most Christmas themed, I knew I should post it before everything else!!!
Enjoy!
Btw, I just bought this cheesecake pan (after Christmas, haven't used it yet) I am way excited to use it asap, b/c then maybe I won't have to use three layers of heavy duty foil to keep water form the water bath leaking in!!!
Friday, January 29, 2010
Oh my, oh my
It has been a very crazy and hectic last couple of weeks. Can you believe that I still haven't posted my awesome Christmas cheesecake? Or the wonderful balsamic brussel sprouts? Or my mother's delicious galopita? Or Paula Deen's chocolate cream cheese pound cake? Or a few other things I've made that I know you would all love? Nope, here I am, trying to quickly check my mail so I can make dinner, Greek chicken pitas with avocado tzatziki sauce and roasted cauliflower and brussel sprouts. My mouth is watering thinking about it. But now I have to go make it!
I'll update soon, I promise! And you won't be disappointed when I do :)
I'll update soon, I promise! And you won't be disappointed when I do :)
Friday, January 22, 2010

Monday, January 18, 2010
Check out this giveaway and review of Eggland's Best!
Picky Palate is giving away (through BlogHer and Eggland's Best) a $100 Visa gift card!
She also has a couple of yummy recipes on there, and the Broccoli Cheddar and Sausage Egg Muffin Pull-A-Parts look so good, I'm making them for Saturday morning breakfast this week for sure!
Go check it out!
http://picky-palate.com/2010/01/18/egglands-best-reviewgiveaway/
She also has a couple of yummy recipes on there, and the Broccoli Cheddar and Sausage Egg Muffin Pull-A-Parts look so good, I'm making them for Saturday morning breakfast this week for sure!
Go check it out!
http://picky-palate.com/2010/01/18/egglands-best-reviewgiveaway/
Thursday, January 7, 2010
Christmas Cookies Part 3- Apple-doodles
Haha, so these were supposed to be something else entirely. Okay, well, not entirely, but they were supposed to be spritz cookies. Which probably would have gotten me more cookies. Oh well, this way worked out too and they were so good! I was kinda surprised b/c in all honestly, I thought they'd just be eh. Really. Eh.
One of my co-workers made these before the holiday (the correct, spritz way) and she loved them and I still had some apple butter left from Apple Holler, my favorite apple orchard.
 So this recipe was found on the Wilton website here and I didn't make any changes to the list of ingredients. The only difference was I rolled them into balls, pressed them into a bowl full of cinnamon sugar and then baked them for about 12-15 min.
They stay pretty fluffy, so I probably should have made them smaller and smooshed them a bit flatter and I would have gotten more out of them, but oh well. they were good and I know what to do the next tme around.

By the way, the reason why I didn't spritz them is b/c my mother broke the cookie press I had and didn't tell me. It was a cordless one from Wilton and I'm not exactly sure what she did, but I think it had something to do when she washed it... Bad mommy. Oh well, it probably would have taken 5 hours to do it that way anyway w/ clean up and all, so this way worked just as well!
These cookies are dense and chewy and cinnamon-y. The cinnamon sugar mix didn't caramelize as much as I would have liked on the top, but that's ok. They were still good and they held their shape well.
Enjoy!
One of my co-workers made these before the holiday (the correct, spritz way) and she loved them and I still had some apple butter left from Apple Holler, my favorite apple orchard.
 So this recipe was found on the Wilton website here and I didn't make any changes to the list of ingredients. The only difference was I rolled them into balls, pressed them into a bowl full of cinnamon sugar and then baked them for about 12-15 min.
They stay pretty fluffy, so I probably should have made them smaller and smooshed them a bit flatter and I would have gotten more out of them, but oh well. they were good and I know what to do the next tme around.

By the way, the reason why I didn't spritz them is b/c my mother broke the cookie press I had and didn't tell me. It was a cordless one from Wilton and I'm not exactly sure what she did, but I think it had something to do when she washed it... Bad mommy. Oh well, it probably would have taken 5 hours to do it that way anyway w/ clean up and all, so this way worked just as well!
These cookies are dense and chewy and cinnamon-y. The cinnamon sugar mix didn't caramelize as much as I would have liked on the top, but that's ok. They were still good and they held their shape well.
Enjoy!
Wednesday, January 6, 2010
Christmas Cookies Part 2- Lavender Lemon Shortbread
 Lemon and lavender go really well together. Lavender makes the taste of the lemon even more bright and fresh that lemon typically is. The first time I've had the combo was when one of my classmate turned friend made lemon lavender scones for a bake fest we had at our other classmate turned friend's house. They were delicious and the lavender did not make the scones taste like flowers like I thought it would!
  Recipe:
1 cup all purpose flour
1/2 tsp fine sea salt
1/3 cup granulated sugar
2 tsp chopped dried lavender blossoms
1/2 cup unsalted butter, softened
1 tsp pure vanilla extract
2 tsp grated lemon rind
Sift the flour and fine sea salt together in a small bowl.
Combine the sugar, lavender and grated lemon rind in the bowl of a stand mixer fitted w/ a paddle attachment. Mix for 15-20 seconds to combine. Add the butter and mix until combined. Mix in the vanilla and squeeze the juice from half the lemon in (careful to keep the seeds out!). Add the flour mixture to the butter mixture and mix on low until it forms a soft dough.
Shape the dough into a disk, wrap tightly in plastic and refridgerate for 20-30 min.
Line a baking sheet with parchment paper or foil. Roll the dough out to 1/4 inch thickness and cut it into shapes w/ your knife or cookie cutter. Place the shapes on the baking sheet and place the baking sheet in the freezer for 15 min, until the dough is stiff.
Preheat oven to 350 degrees F while the cookies are in the freezer.
Bake the cookies for 12-15 mins or until the edges are a golden brown. Let them cool for 15 min on the sheet, then transfer them to a wire rack to cool completely.
These cookies keep for up to 5 days in an airtight container.
They were honestly delicious. My mother isn't one for "crazy things" like this and she thought they were very refreshing, different, but refreshing. My yiayia loved them. I'd like to try them w/ the Fleur de Sel someday. I have a feeling they'd be delicious that way too!
Subscribe to:
Posts (Atom)